How to Turn Off Automatic WordPress Core Updates
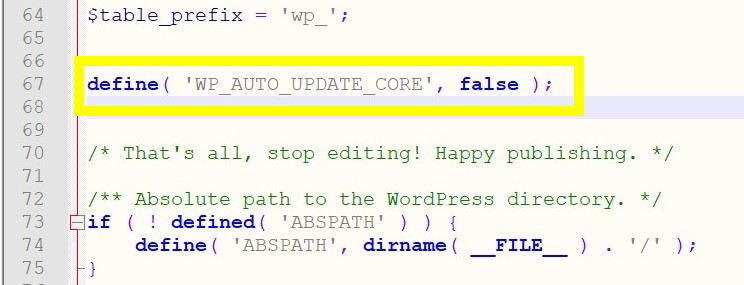
1. Access your wp-config.php file in order to add this snippet:
define( 'WP_AUTO_UPDATE_CORE', false );
To access the file, you’ll need to either use FileZilla (or another File Transfer Protocol (FTP) solution) or the file manager in your web host’s cPanel. Once you have access, move to the next step.
2. Find wp-config.php by navigating to app > public.
3. Open up the file and add the code.
Add the code towards the end, right above the line that says, “/*That’s all, stop editing! Happy publishing. */:”
Now WordPress will no longer install updates automatically. This only applies to the WordPress core updates. To disable updates for plugins and themes, proceed to the next section.
How to Turn Off Automatic Updates on WordPress PlugIns and Themes
1. Access Your Theme’s functions.php file.
Adding a line of code to your theme’s functions.php file will disable automatic updates on plugins and themes. You access this file by heading to your WordPress dashboard and navigating to Appearance > Theme Editor:

2. Open function.php File and Add the Below Filter Codes.
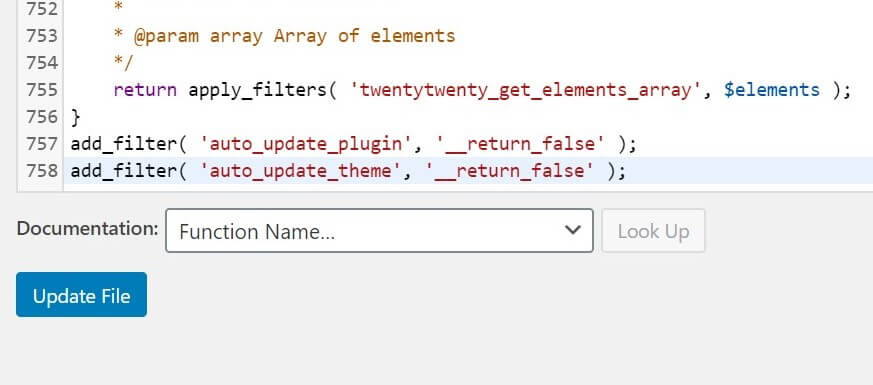
Select your theme and open up function.php from the list on the right. Add the following code to the bottom of the file to disable automatic plugin updates:
add_filter( 'auto_update_plugin', '__return_false' );
To turn off updates for themes, use this code:
add_filter( 'auto_update_theme', '__return_false' );
If you want to turn them off for both your theme and any plugins you’re using, simply add both lines:
You can mix and match these codes in any combination to create an update solution that works for you.